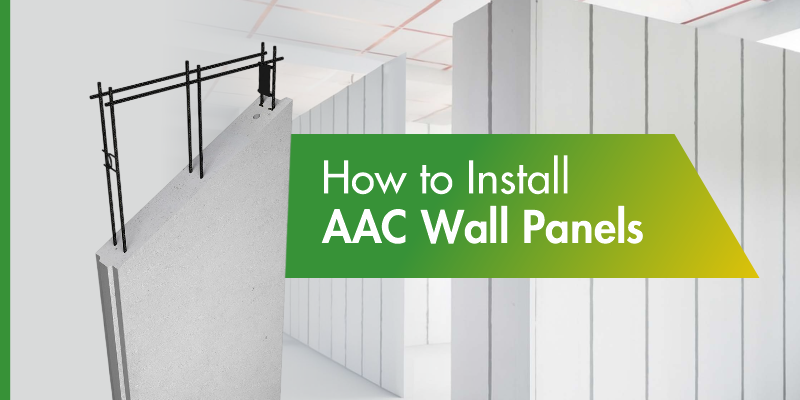
How to Install AAC Wall Panels? The 2026 Step-by-Step Manual for Site Engineers
Key Takeaways
- Inspect every panel on arrival before installation begins. Reject damaged panels.
- Mark floor and ceiling boundaries with a laser level. Set up the locator frame before the first panel goes up.
- Fix L-brackets to the concrete wall before placing panels. Use Z-clips at the ceiling.
- Apply thin-bed mortar only to the upright edge of the installed panel, not to a panel lying flat.
- Never install a panel narrower than 200mm. Use a cut AAC block as filler instead.
- Wait 72 hours after installation before MEP chiselling begins.
- Level the floor with screed before installation if it is uneven. Do not compensate with extra mortar under the panel.
A panel that is misaligned by 5mm on the first unit will become a 50mm error by the tenth. A joint that skips the thin-bed mortar will crack before the building is handed over. An MEP team that starts chiselling 24 hours after installation instead of 72 will damage the bond before it sets.
AAC wall panels are precise, factory-made products. The material performs exactly as it is designed to. But that performance depends on how the installation is carried out on site. Most failures with wall panels trace back to shortcuts taken during preparation, alignment, or jointing, not to the panel itself.
This guide covers the full installation sequence for story-height AAC wall panels, from batch inspection to handover. It is written for site engineers, supervisors, and contractors who need one clear reference for every stage of the process.
What Does Proper Preparation Look Like Before a Single Panel Goes Up?
Step 1: Inspect the Batch on Arrival
Before any panel reaches the installation area, check the batch at the staging zone. Verify the production batch number, check panel dimensions against the approved drawings, and look for any shipping damage such as chipped edges, surface cracks, or warping.
Panels that do not meet the dimensional tolerance should be flagged straight away. Do not install a damaged or warped panel; try to correct it with extra mortar. That approach creates problems later.
- Check length, width, and thickness against the project specification
- Reject panels with visible edge chipping deeper than 5mm
- Store panels off the ground on a flat surface, covered to prevent moisture absorption before installation
Step 2: Mark the Wall Boundaries Using a Laser Level
Accuracy at this step determines accuracy for the entire wall. Use a laser level to mark the exact wall boundaries on the floor slab and on the ceiling above. Both lines must be directly above each other and perfectly parallel.
Use a chalk line on the floor to give the mason a clear position for the base of the first panel. Any error here runs all the way up the wall.
Step 3: Set Up the Locator Frame
Fix a temporary positioning frame made from steel channel or timber along the chalk line on the floor and at the ceiling. This frame guides every panel into the correct plumb position during installation. The supervisor must check the accuracy of this frame before any panel is placed.
This step is often skipped on busy sites. It should not be. A locator frame takes about 30 minutes to set up and saves hours of realignment work later.
What Is the Step-by-Step Process for Installing AAC Wall Panels on Site?
Step 1: Handle and Transport Panels Correctly
Story-height panels are heavier than individual AAC blocks. Using the correct handling equipment protects both the panel and the crew.
- Use a lever arm or panel lifter to move panels from the pallet to the installation area without dragging them
- For larger panels, use a spreader beam with a crane or hoist to spread the lifting load evenly across the panel width
- Never lift panels using ropes wrapped around the panel body. This causes edge chipping and internal cracking
- When cutting is needed on site, spray water on the blade and the panel surface to keep the blade cool and reduce dust
Step 2: Prepare the Concrete Surface
Before the first panel is placed, roughen the concrete surface at the base and at the adjacent wall where the panel will sit. Clean the area thoroughly using a brush or blower to remove all dust and loose material.
Apply a bonding agent to the cleaned concrete surface. This is the connection point between the structure and the panel. It must be clean and properly treated.
Fix the L-bracket to the concrete wall at the marked position using anchor bolts and screws before placing any panel. The bracket must be in position before the panel arrives at that location.
To understand why thin-bed mortar gives a stronger bond than conventional cement mortar for panel joints, read AAC block jointing mortar vs cement mortar.
Many builders today are shifting to modern materials, and if you want to understand this transition better, you can read AAC Block vs Red Brick.
Step 3: Position and Align the First Panel
The first panel sets the reference for every panel that follows. Getting this one right makes the rest of the wall straightforward.
- Position: Use the panel lifter or installation machine to set the panel into the base locator frame. The base of the panel should rest on the floor slab or screed, not be suspended above it.
- Align: Use wooden wedges at the base and top to raise and position the panel correctly. Check plumbness on both faces of the panel using a laser level or plumb bob.
- Check: Use an aluminium ruler or straight edge to confirm the surface is flat. A panel that is plumb in only one direction is not correctly installed.
- Fix: Once the panel is plumb and correctly positioned, lock the wedges and secure the L-bracket to the floor using screws. Use Z-clips at the ceiling connection to allow the building to move slightly during wind or seismic events without putting load on the panel.
Step 4: Apply Thin-Bed Mortar to the interlocking panel joint
This step is what determines whether the wall stays crack-free over time. The mortar must be applied the right way.
Important: Apply thin-bed mortar to the side edge of the panel that is already standing upright and fixed. Do not apply mortar to a panel that is still lying flat and then tilt it up. When a panel with mortar on it is rotated from horizontal to vertical, the mortar slides down and leaves a bare gap at the bottom of the joint. That gap is where cracks start.
Use a notched trowel to apply an even layer of thin-bed mortar to the side edge of the standing panel. Keep the joint thickness at 2 to 3mm. A thicker joint wastes material and weakens the connection.
To calculate how much mortar the project needs before placing the order, read how to calculate block jointing mortar consumption.
Step 5: Install the Remaining Panels
After the first panel is fixed and the mortar is applied to its side edge, every panel that follows uses the same sequence: position, align, wedge, check, fix, apply mortar to the side edge.
- Each panel locks into the side edge of the fixed panel
- Check plumbness after each panel, not only at the end of the full wall
- Never install a panel that is narrower than 200mm. If the remaining gap at the end of a wall run is less than 200mm, use an AAC block cut to the correct width as filler instead.
- Connect the top of each panel to the upper floor beam before moving to the next panel
Step 6: Install Lintels at Door and Window Openings
Openings for doors and windows need a lintel above them to carry the load across the gap.
- Set up formwork and reinforcement for the lintel as per the structural drawings
- After concrete is poured for the lintel, wait at least 48 hours before installing panels or AAC liner on the door side.
- Fix the steel plate connecting the lintel to the installed wall panels. Two workers lift both ends of the lintel together, align it, check plumbness, and apply grout at the connecting plate
- Finish the panel slots around the opening once the lintel is set and secure
Step 7: Surface Finishing
After all panels are up and joints have set, finish all slots, circuits, and connection points between panels and the structure. Apply surface treatment as required before handing over to the finishing team.
For the finishing stage, using the right plaster makes a real difference to surface quality and durability.
If you are still comparing different walling options before installation, you can also read AAC Wall Panels Vs. AAC Blocks to understand how panels perform in real projects.
What Tools Does a Site Team Need for AAC Wall Panel Installation?
|
Category |
Tool |
What It Is Used For |
|
Lifting |
Spreader beam |
Spreads the lifting load across the panel width to prevent edge damage |
|
Lifting |
Crane or hoist |
Moves panels that are too large or heavy for manual handling |
|
Lifting |
Panel lifter or lever arm |
Moves panels from pallet to installation position without dragging |
|
Alignment |
Laser level |
Marks floor and ceiling boundaries and checks plumbness during installation |
|
Alignment |
Spirit level and plumb bob |
Secondary check for vertical alignment on each panel |
|
Alignment |
Wooden wedges |
Fine-tunes base and top position of each panel before final fixing |
|
Alignment |
Rubber mallet |
Alignment Rubber mallet Seats panels into the interlocking joint without damaging edges |
|
Fastening |
Power drill and heavy-duty anchors |
Fixes L-brackets and Z-clips to floor slab and ceiling beam |
|
Fastening |
L-brackets and Z-clips |
Mechanical connection between each panel and the structural frame |
|
Jointing |
Notched trowel |
Applies an even coat of thin-bed mortar to the side edge of the joint surface |
|
Jointing |
Paddle mixer |
Mixes thin-bed mortar to a uniform consistency before application |
|
Jointing |
Brush or blower |
Cleans panel and concrete surfaces before mortar is applied |
Selecting the right thin-bed mortar for panel joints is as important as how it is applied.
Also, read the key features to check in AAC block jointing mortar before ordering materials.
What Are the Rules That Prevent the Most Common Installation Failures?
Rule 1: Never Install a Panel Narrower Than 200mm
If the remaining gap at the end of a wall run is less than 200mm, do not cut a panel down to that size and install it. A panel that is too narrow does not provide enough contact surface for the L-bracket to hold properly and is unstable. Use an AAC block cut to the correct width as filler instead. This is the correct method, not a workaround.
If you want to understand AAC materials in detail before using them, you can also Know about AAC Blocks.
Rule 2: Always Apply Mortar to the Standing Panel’s Edge, Not the Flat Panel
Only apply thin-bed mortar after the previous panel is already standing upright and fixed in position. If mortar is applied to a panel that is still flat on the ground and then tilted up, the mortar slides down during the rotation. This leaves the lower part of the joint without mortar. That bare joint is where wall cracks begin.
Incorrect jointing is one of the main reasons behind wall cracks. To understand this better, read How to fix Cracks.
Rule 3: Wait 72 Hours Before the MEP Team Starts Chiselling
The mortar joints between panels need 72 hours to reach enough strength before pipe routing can begin. If the MEP team starts chiselling at 24 or 48 hours, they risk disturbing joints that have not fully set yet. The MEP team must also follow the specified cutting method to avoid cracking the panel body while making routes for pipes and conduits.
What Should You Do When Problems Come Up on Site?
What If the Floor Slab Is Uneven?
Do not use extra mortar under the panel base to make up for an uneven floor. Extra mortar at the base shifts over time and creates an unstable foundation for the panel. The correct approach is to apply a levelled screed along the wall line before installation begins. Let the screed cure completely, check it with a laser level, and then start installing panels on the prepared surface.
How Do You Handle Large Door or Window Openings?
Large openings need a lintel above them to carry the load across the gap. The lintel must be designed by the structural engineer for the specific span and load. Fix connecting steel plates between the lintel and the panels on both sides of the opening. After the lintel concrete is poured, wait 48 hours before installing any panels or AAC liners next to the opening. A lintel that has not cured fully will deflect and affect the panel alignment above it.
What If a Panel Is Out of Plumb After Being Fixed?
If a panel is out of plumb after the wedges are locked but before the brackets are fully tightened, reposition the wedges and recheck with the laser level. Once the L-brackets are fully anchored and the mortar joints have set, correcting without damage becomes very difficult. Check plumbness panel by panel during installation rather than checking the whole wall at the end.
Build It Right, Build It Once
AAC wall panels can reduce construction time compared to block-by-block masonry. But that speed benefit only applies when the installation process is followed correctly from the start.
A panel installed without a locator frame, with the wrong mortar sequence, or on an uneven floor will need rework. That rework takes back every hour saved during installation.
Preparation is what separates a wall that stands correctly for decades from one that shows cracks within months. Follow the steps in this guide. Do not skip the locator frame. Apply mortar to the upright edge. Wait 72 hours before MEP work begins.
Get these details right, and the wall takes care of itself.
For technical support on AAC wall panel installation for your project in India, connect with BigBloc Construction, the manufacturer of ZMARTBUILD Wall panels and a trusted AAC supplier in Surat, Gujarat, and across India.
Frequently Asked Questions
It depends on the panel size and the site. Smaller story-height panels can be moved using a manual panel lifter or lever arm on compact sites. For panels above 3 metres or on large commercial projects, a spreader beam with a crane or hoist is the right choice. The spreader beam spreads the lifting load across the full panel width, which prevents edge damage that a single-point lift would cause. Because AAC panels are much lighter than dense concrete precast panels, smaller and more affordable cranes can be used.
AAC wall panels use an interlocking joint profile. One edge of each panel has a raised ridge and the other edge has a matching slot. The slot of the new panel locks onto the ridge of the already-installed panel. Before this is done, thin-bed mortar is applied to the upright ridge edge of the installed panel. The mortar fills the 2 to 3mm joint space and bonds the panels together. Separately, L-brackets at the floor and Z-clips at the ceiling fix each panel to the structural frame.
A gap is left at the top of the panel to allow for movement between floors. When a building moves under wind or seismic loading, the floors shift slightly relative to each other. If the wall panel is rigidly fixed at the top with no gap, that movement puts stress on the panel and cracks it. The gap at the top is filled with PU foam or a flexible filler, not with rigid mortar. The Z-clip at the ceiling is designed to allow this movement without putting load on the panel. The exact gap size should follow the structural engineer’s specification for the building height and seismic zone.