
How to Plaster AAC Block Walls: Complete Step-by-Step Guide
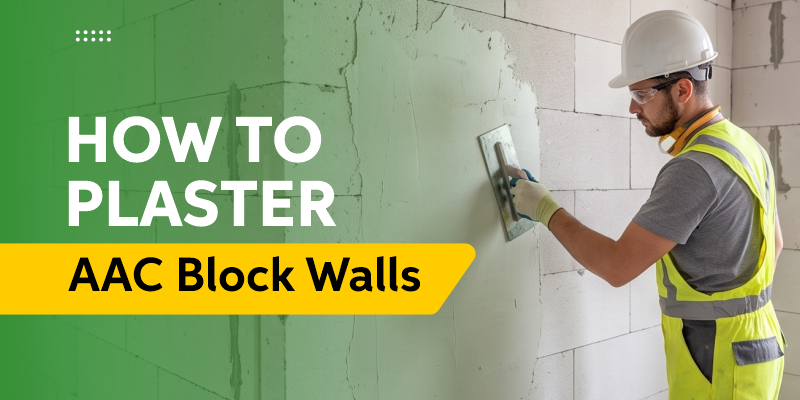
AAC blocks provide a relatively flat and even masonry surface, so they generally need less plaster than conventional brick walls. But good plastering still depends on what you do before you apply it. Dust on the wall, excess moisture, unfilled chases, thick plaster, and untreated RCC–AAC junctions can lead to hollow patches, cracks, and debonding.
This guide explains how to plaster AAC block walls, how to prepare the surface, which plaster options you can use, how much plaster thickness is generally required, and what site checks can help prevent common problems.
New to AAC blocks? Read our guide on what are AAC blocks to understand how they are made and how their properties differ from conventional brick.
Can AAC Block Walls Be Plastered?
Yes. You can plaster AAC block walls on both internal and external surfaces. Common options include cement-sand plaster and ready-mix cement-based plaster. You can also use gypsum plaster for suitable internal applications.
The important point is that AAC should not simply be treated like conventional brick masonry. AAC is porous; its surface needs proper moisture control, and the junction between AAC masonry and RCC elements needs attention before plastering.
For most projects, follow the plaster system and the manufacturer’s instructions, along with the project specification.
Why Does AAC Block Plastering Need Attention?
There are a few practical differences between AAC and conventional brick masonry.
AAC absorbs water quickly
A dry AAC wall can draw water from fresh plaster. If the plaster loses moisture too quickly, adhesion can suffer and the risk of cracking increases. At the same time, soaking the wall is not the solution. Excess water can make plaster difficult to apply and can affect its grip.
The aim is controlled dampening, unless the selected plaster system specifies a different preparation method.
AAC walls are generally flatter
AAC blocks are factory-made and have larger dimensions than conventional bricks. A properly built AAC wall can therefore have a relatively even surface. That reduces the need for unnecessarily thick plaster.
AAC meets RCC at several locations
AAC masonry often meets concrete at columns, beams, slabs, door and window openings and other junctions. These materials can behave differently as temperature and moisture change. These interfaces therefore need suitable treatment before plastering.
For better masonry preparation, see our guide on how to build walls using AAC blocks.
What Should You Do Before Plastering an AAC Block Wall?
Most plastering problems are easier to prevent before the first coat.
Step 1: Inspect the masonry
Check the wall with a straightedge and inspect it for:
- Walls that are out of alignment or plumb
- Open or poorly filled block joints
- Chipped or damaged blocks
- Cracks
- Gaps below beams or slabs
- High spots and depressions
Correct these issues before plastering.
Plaster should not be used to compensate for major masonry irregularities. If a section requires an unusually thick layer just to bring it into alignment, the masonry should be corrected first.
Step 2: Complete electrical and plumbing work
Complete electrical and plumbing chases before plastering. After cutting the chases, fill them properly with suitable repair material and allow it to harden.
Where a chase is wide or deep enough to require reinforcement, use mesh or another treatment specified by the project or plaster system.
Doing this work after plastering can leave visible lines and cracks through the finished surface.
Step 3: Clean the AAC wall
AAC cutting produces fine dust. This dust can interfere with the bond between the plaster and the wall.
Before plastering:
- Brush the wall properly
- Remove loose particles
- Remove oil, grease and dried mortar
- Clean the surface again if the wall has been exposed for some time
A clean substrate gives the plaster a better surface to bond with.
Step 4: Treat RCC–AAC junctions
Pay particular attention to locations where AAC meets concrete, such as:
- Columns
- Beams
- Slabs
- Door and window frames
- Filled chases
Mesh or other reinforcement may be required at these interfaces depending on the construction and plastering system.
Where mesh is specified, it should adequately bridge the junction between the two materials rather than sit on only one side. The exact mesh type, width and fixing method should follow the project specification or manufacturer’s instructions.
Step 5: Check the moisture condition
AAC walls should generally be damp, not saturated, before applying conventional cement-based plaster. Lightly spray the wall so the surface is damp without water running down the face or collecting at the bottom.
A dry wall can pull water out of fresh plaster too quickly. An excessively wet wall can make application difficult. Some ready-mix, polymer-modified and gypsum systems have different substrate preparation requirements. Always follow the selected product’s instructions.
Materials Required for Plastering AAC Block Walls
|
Material |
Purpose |
|
AAC-compatible plaster |
Main plaster layer |
|
Clean water |
Mixing |
|
Bonding agent or primer |
Where specified by the plaster system |
|
Fibreglass or wire mesh |
Junction and crack-control treatment |
|
Corner beads |
Protecting external corners |
|
Trowel |
Applying plaster |
|
Straightedge |
Levelling |
|
Float |
Surface finishing |
The exact material combination depends on the selected plaster system. For proprietary ready-mix or gypsum products, follow the manufacturer’s technical instructions.
How to Plaster AAC Block Walls Step by Step
The following process covers the main stages from masonry preparation to curing.
Step 1: Ensure the AAC masonry is ready
Make sure the masonry is complete and has reached the required condition before plastering.
Check:
- Wall alignment
- Block joints
- Damaged areas
- MEP chases
- RCC–AAC junctions
Do not start plastering while major masonry corrections are still pending.
Step 2: Clean the wall surface
Brush the complete wall and remove AAC dust, loose particles, oil, grease and mortar deposits. The plaster should bond to the AAC surface, not to a layer of dust sitting on it.
Step 3: Prepare RCC–AAC junctions
Treat the junctions between AAC and concrete according to the specified system.
Where mesh is required, install it securely before plastering. Pay particular attention to columns, beams, slabs, openings and repaired chases.
Step 4: Prepare the plaster
The mixing method depends on the product. For site-mixed cement-sand plaster, use the specified cement-to-sand proportion and add water gradually. For ready-mix plaster, use the water quantity specified on the bag. For gypsum plaster, follow the manufacturer’s mixing and bonding-coat requirements.
There is no single water-to-powder ratio that applies to every AAC plaster product.
Adding extra water just to make plaster easier to spread can affect the plaster’s final performance. If you are considering ready-mix plaster, our guide on what is ready-mix plaster explains how it differs from conventional site-mixed plaster.
Step 5: Apply the first coat
Apply the plaster evenly over the prepared AAC surface. Press the plaster properly onto the wall rather than simply placing a loose layer over it.
Keep the thickness within the specified range. If one portion of the wall requires substantially more material, correct the masonry where possible rather than using plaster to hide the problem. Where additional thickness cannot be avoided, build it in suitable coats as specified by the plaster system.
Step 6: Level the plaster
Use a straightedge to level the plaster while it is still workable. Work against suitable level guides or screeds and check the surface for dips and high spots.
This stage strongly affects the wall’s final appearance.
Step 7: Apply the finish coat where required
Some plaster systems use a single coat, while others require more than one coat. If a second coat is specified, apply it only after the previous coat has reached the required condition.
The external plaster system may also require a separate finishing coat depending on the exposure and specification.
Step 8: Finish the surface
Use the appropriate float or trowel technique for the required finish. Avoid excessive working of the surface. Overworking cement plaster can bring fine material and water to the surface and may contribute to fine surface cracking.
For ready-mix plaster, follow the product-specific application method. See our guide on how to apply ready-mix plaster for more detail.
Step 9: Cure the plaster where required
Curing depends on the plaster system. Cement-based plaster requires appropriate curing to support proper strength development and reduce drying-related problems.
Ready-mix and polymer-modified products may have different curing requirements. Gypsum plaster should not be water-cured. Always follow the product’s technical instructions and protect fresh plaster from harsh sun, strong wind and rain.
Many cracks that show up in plaster actually start in the masonry below. Our guide on how to avoid cracks in AAC block walls covers what to get right from the first course.
What Is the Recommended Plaster Thickness for AAC Block Walls?
There is no single plaster thickness that applies to every AAC wall.
The required thickness depends on:
- Internal or external application
- Wall flatness
- Plaster material
- Number of coats
- Weather exposure
- Manufacturer’s instructions
- Project specification
For conventional cement-based plaster, the following ranges can be used as general guidance:
|
Application |
Typical site range |
IS 6041 guidance |
|
Internal walls |
10–12 mm |
6–12 mm, one coat |
|
External walls, normal rain |
15–20 mm |
10–15 mm, one coat |
|
External walls, heavy rain |
20–25 mm |
About 15 mm + 5–10 mm |
|
Gypsum, internal |
Usually 8–12 mm |
Follow product instructions |
Treat these figures as guidance rather than a universal specification. The actual thickness should follow the selected plaster system and project requirements.
Why should you avoid excessive plaster thickness?
Thicker plaster adds weight and material consumption and can increase shrinkage as it dries. If a wall needs a very thick layer to achieve alignment, investigate the masonry rather than automatically increasing plaster thickness.
For more on factors that affect ready-mix plaster performance, see what makes ready-mix plaster durable.
Internal vs External Plastering of AAC Walls
Internal and external walls have different requirements because the external surface is exposed to rain, sunlight, wind and temperature changes.
|
Factor |
Internal AAC walls |
External AAC walls |
|
Exposure |
Normal indoor conditions |
Rain, sun, heat and wind |
|
Typical cement plaster |
About 10–12 mm |
About 15–20 mm |
|
Main requirement |
Even finish |
Weather protection |
|
Plaster options |
Cement-sand, ready-mix, suitable gypsum |
Cement-sand or suitable weather-grade plaster |
|
Junction treatment |
As specified |
Greater attention to junctions and openings |
|
Curing |
As required by product |
Important for cement-based systems |
External walls need particular attention around window frames, slab junctions and other locations where water can enter. Gypsum plaster should generally be limited to suitable internal dry areas and should not be used for external walls.
For a closer comparison of applications, see ready-mix plaster for interior vs exterior walls.
Which Plaster Is Best for AAC Blocks?
There is no single plaster that is best for every AAC wall. The choice depends on location, finish, exposure, application method, and project specifications.
|
Plaster type |
Suitable application |
Advantages |
Important consideration |
|
Cement-sand plaster |
Internal and external |
Familiar method and widely used |
Mixing quality and curing need control |
|
Ready-mix cement plaster |
Internal and external |
Consistent factory-controlled mix |
Follow manufacturer’s water and thickness requirements |
|
Gypsum plaster |
Suitable for internal areas |
Smooth finish and fast application |
Not suitable for external or damp applications |
The important point is to select a compatible plaster system rather than choosing a material only because it is commonly used on brick walls. For proprietary products, follow the manufacturer’s technical data for surface preparation, mixing, thickness and curing.
If you are comparing internal plaster options, see gypsum plaster vs ready-mix plaster.
Bigbloc’s ready-mix plaster product, NXTPLAST, is designed for plastering applications including AAC block walls.
For product-specific information such as application, thickness, water requirement and technical specifications, refer to the NXTPLAST ready-mix plaster page.
Product-specific instructions should always take priority over general guidance in this article.
How to Prevent Cracks in AAC Block Plaster?
Cracks can have different causes, so no single step guarantees a crack-free wall. However, you can avoid several common site mistakes.
1. Do not soak the AAC wall
The surface should generally be damp, not dripping wet, before cement-based plastering.
2. Do not plaster over dust
AAC dust can interfere with adhesion and may contribute to hollow patches.
3. Treat RCC–AAC junctions
Columns, beams, slabs and openings need appropriate junction treatment as specified by the system.
4. Avoid unnecessary plaster thickness
Use the masonry itself to establish alignment wherever possible.
5. Use the correct plaster system
The plaster must be suitable for the location and substrate.
6. Measure water accurately
Adding excess water can affect the strength and drying behaviour of plaster.
7. Cure cement-based plaster properly
Follow the curing period specified for the plaster system.
8. Complete and stabilise MEP chases before plastering
Freshly repaired chases can move as the repair material dries. Allow them to reach the required condition before covering them with plaster.
For a deeper look at different wall cracks and their causes, see why wall cracks appear and how to fix them.
Pre-Plastering Checklist for Site Supervisors
Before the plaster arrives
☐ Walls are straight and reasonably plumb
☐ Block joints are filled
☐ Damaged blocks have been repaired or replaced
☐ Electrical and plumbing chases are complete
☐ Chase repairs have hardened
☐ RCC–AAC junction treatment has been completed
☐ External walls are in suitable condition for plastering
On the day of plastering
☐ AAC walls are free from dust and loose particles
☐ Required mesh is properly fixed
☐ Corner beads are installed where required
☐ Wall moisture condition matches the plaster system
☐ Mixing water is measured as specified
☐ Plaster thickness has been communicated to the team
After plastering
☐ Surface is checked with a straightedge
☐ Plaster thickness is within specification
☐ Finish is consistent
☐ Curing has started where required
☐ Fresh plaster is protected from strong sun, wind and rain
For problems that may appear after application, see common ready-mix plaster problems.
Common Mistakes When Plastering AAC Block Walls
- Soaking the AAC wall
AAC generally needs controlled dampening for conventional cement plaster, not saturation. - Plastering over dust
Dust can become a weak layer between the AAC and plaster. - Ignoring RCC–AAC junctions
These interfaces need suitable treatment because different materials meet at the same location. - Applying excessive thickness
Thick plaster increases material use and can increase shrinkage-related problems. - Choosing an unsuitable plaster
For example, gypsum is not intended for external or damp applications. - Adding extra water
More water may make application easier but can affect the final plaster. - Skipping curing where required
Cement-based plaster needs proper curing. - Plastering before repairs are ready
Fill electrical and plumbing chases and allow them to reach the required condition before plastering.
The Bottom Line
Good AAC block plastering starts before you mix the plaster.
The wall needs to be properly aligned, clean and ready. Electrical and plumbing work should be completed first. RCC–AAC junctions need the specified treatment. The wall should have the correct moisture condition, and the plaster should be mixed and applied according to the specified thickness.
The final result depends on the complete system: masonry preparation, surface preparation, plaster selection, application, finishing and curing.
Keep the plaster manufacturer’s technical data available on site so the plastering team knows the required water, thickness, application method, and curing requirements before work begins.
For project-specific help with AAC blocks, plastering systems or material requirements, talk to the Bigbloc team.
Recent Post:
Frequently Asked Questions
Yes. You can plaster AAC block walls internally and externally using suitable cement-based or ready-mix plaster systems. You can also use suitable gypsum plaster for some internal applications. Surface preparation and application methods should follow the selected plaster system.
There is no single plaster that is best for every AAC wall. Cement-sand plaster, ready-mix cement plaster and suitable gypsum plaster can all be used for specific applications. The choice depends on whether the wall is internal or external, the required finish and the manufacturer’s or project’s specification.
For conventional cement-based plaster, the source guidance commonly recommends around 10–12 mm for internal walls and 15–20 mm for external walls. However, the exact thickness depends on the plaster system, wall condition and project specification.
For conventional cement-based plaster, AAC walls should generally be damp, not soaked. Lightly spray the wall before plastering so it does not draw water rapidly from the plaster. Some ready-mix, polymer, and gypsum systems have different requirements, so follow the product instructions.
Start with proper masonry preparation. Clean the AAC surface, complete and repair MEP chases, treat RCC–AAC junctions as specified, control plaster thickness, measure mixing water correctly and cure cement-based plaster as required. These steps address common causes of cracking, although no plastering method can guarantee that cracks will never occur.