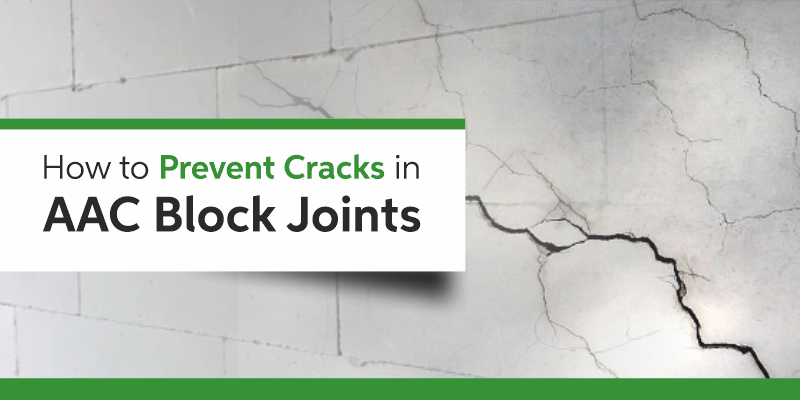
6 Mistakes to Avoid Using AAC Block Jointing Mortar
Why the Joint Matters More Than You Think
Most people who have worked with traditional brickwork follow the same habits on AAC sites. That is where small mistakes begin.
In brickwork, the mortar joint is around 10 to 12 mm thick. It can adjust uneven surfaces or slight changes in the mix. AAC construction is different.
The joint in AAC blockwork is only 2 to 3 mm thick. It is a ready mix made specially to join two smooth blocks together. Because the layer is so thin, it needs proper mixing and careful application.
The challenge is that problems do not show immediately. The wall may look fine at first. Months later, small cracks can appear. In many cases, the reason is not the plaster but the joint inside the wall.
This can happen due to improper mixing, dusty block surfaces, using the mix after too much time, or making the joint thicker than required. If you’re using AAC blocks on your project, these are the mistakes you really can’t afford to make.
Mistake #1: Adding Water by Eye
On many AAC sites in India, the block jointing mortar is mixed without measuring the water. The bag is opened. Water is poured from a bucket by guess. Mixing starts.
After 15 to 20 minutes, when the mix becomes thick, more water is added to make it soft again.
This may look normal, but AAC jointing mortar needs the right water ratio. Too much or too little water can affect how well the blocks bond together.
This is the single most common mistake, and it quietly ruins walls.
Thin-bed jointing mortar isn’t forgiving about water ratios. It contains polymers that need to activate correctly. Too much water and the polymer chains weaken. The result is low tensile strength, higher shrinkage as it dries, and a brittle joint that looks fine until it doesn’t. Too little water and the mortar won’t spread evenly, leaving incomplete contact between blocks.
And adding water to a mix that’s already started setting? That doesn’t refresh the mortar. It breaks it.
What to do instead: Use a measuring jar. Every time, without exception. Mix with a paddle mixer until the consistency is smooth and creamy, with no lumps and no dry pockets. Once the mix is done, it’s done. If it stiffens past its working time, throw it out and mix fresh.
Mistake #2: Using a Flat Trowel
This one surprises people. A trowel is a trowel, right?
Not for AAC blockwork. The flat mason’s trowel that every bricklayer uses is completely wrong for thin-bed mortar. It can’t reliably deliver a 2 to 3 mm layer. Some spots get too much, some get almost nothing, and you end up with air pockets hidden behind blocks that look perfectly placed.
Those hollow spots matter. They reduce surface contact, disrupt load transfer, and eventually show up as cracks or a dull thud when you knock on the wall.
What to do instead: Use a 6 mm x 6 mm notched trowel. It creates consistent ridges across the block face, and when the next block is pressed down gently, those ridges collapse and fill evenly, giving you close to 100% surface coverage and no voids. It’s not an expensive tool, but it makes a real difference.
Mistake #3: Skipping Surface Preparation
AAC blocks have small pores. This is what makes them light and good for heat control. But on-site, this needs attention.
If a block is very dry from summer heat, covered with dust from cutting, or taken from a dry stack and used directly, it can absorb water from the jointing mortar too quickly.
When this happens, the mortar does not get enough time to set properly. The bond between the blocks becomes weak. From the outside, the joint may look fine. But inside, it is not strong enough.
What to do instead: Before applying mortar, brush off any dust or cutting powder from the block face. Then lightly mist the surface with water. The condition you’re aiming for is called
S.S.D. (Surface Saturated Dry). The pores in the block are filled with moisture, so the block won’t aggressively absorb water from the mortar, but the surface itself isn’t wet or slippery. It’s a small thing to do and takes about ten seconds per block. The bond strength difference is significant.
Also Read: How Much Do AAC Blocks Cost in India?
Mistake #4: Spreading Too Far Ahead
On busy sites, it is common to spread mortar on many blocks at once and then place them one by one. It may feel like it saves time.
But AAC jointing mortar can stay open only for a short time, usually around 5 to 10 minutes, depending on the product and weather. After that, the top layer starts to dry.
If a block is placed on this dried layer, it may look properly joined, but the bond is not strong. The joint becomes weak.
These weak joints may not show any issue during construction. The problem may appear later when the wall carries more load or when temperature changes cause slight movement.
What to do instead: Spread only as much mortar as you can cover in about 5 minutes. Place the block immediately. If the mortar has started to dry on top, remove it and apply a fresh mix.
It may seem slower at that moment, but it helps avoid repairs later.
Also Read: Benefits of Using AAC Blocks
Mistake #5: Using Mortar to Adjust an Uneven Base
If the first layer is not level, many people try to fix it by adding more mortar on one side and less on the other. This may work in brickwork, but not in AAC blockwork.
AAC jointing mortar is made to be used in a thin layer of 2 to 3 mm. If it is applied too thick, like 8 or 10 mm, it does not perform the same way. It can shrink more and may lead to cracks. The joint, which should hold the wall strong, becomes weak.
What to do instead: Use normal sand cement mortar only for the first leveling layer. Make sure the base is flat and level before starting AAC blocks. After that, keep every joint between 2 and 3 mm. If the base is uneven, correct the base. Do not try to adjust it with thick jointing mortar.
Mistake #6: Ignoring Vertical Joints
Most attention goes to the horizontal joints. The vertical joints between blocks are sometimes left empty or only lightly filled because the blocks fit closely.
But these joints are important. If they are not properly filled, the wall can develop weak lines. Over time, with wind or small movement in the building, cracks can appear along these lines. It can also allow moisture to enter behind the plaster.
What to do instead: The better way is to apply a thin layer of jointing mortar on the vertical side of each block before placing it. Make sure the full surface is covered, not just a thin line on the edge. It takes only a few extra seconds but makes the wall stronger.
Also Read: AAC Block vs Red Brick
Pro Tip: Use a Rubber Mallet
After placing a block, it should be gently tapped to set it in place. Always use a rubber mallet.
Using a steel hammer or the handle of a tool can damage the edges of AAC blocks. AAC blocks are strong when pressure is evenly spread, but their corners can chip easily. Small chips may look minor, but they can lead to cracks later.
A rubber mallet spreads the impact evenly and helps the block sit properly without damage.
Final Thought
AAC block walls perform very well when installed correctly. The blocks are made with good accuracy. Most issues happen because of old habits carried from brickwork.
The solution is simple and practical. Measure the water properly. Use the right tools. Work within the right time. Keep the joints thin and clean.
Small changes on the site can make a big difference in how long the wall stays strong and crack-free.
For project-specific guidance on jointing mortar application, the Bigbloc team can provide on-site technical support and help you get it right from the first course.